How to Use Selenium to Web-Scrape with Example – Towards …
Scraping NBA Player Names and Salaries from Using SeleniumPhoto by JC Gellidon on UnsplashSelenium is a Python library and tool used for automating web browsers to do a number of tasks. One of such is web-scraping to extract useful data and information that may be otherwise unavailable. Here’s a step-by-step guide on how to use Selenium with the example being extracting NBA player salary data from the website install seleniumOnce installed, you’re ready for the selenium import webdriverfrom import Keysimport pandas as pdA webdriver is a vital ingredient to this process. It is what will actually be automatically opening up your browser to access your website of choice. This step is different based on which browser you use to explore the internet. I happen to use Google Chrome. Some say Chrome works best with Selenium, although it does also support Internet Explorer, Firefox, Safari, and Opera. For chrome you first need to download the webdriver at. There are several different download options based on your version of Chrome. To locate what version of Chrome you have, click on the 3 vertical dots at the top right corner of your browser window, scroll down to help, and select “About Google Chrome”. There you will see your version. I have version 80. 0. 3987. 149, shown in the screenshots you need to know where you saved your webdriver download on your local computer. Mine is just saved in my default downloads folder. You now can create a driver variable using the direct path of the location of your downloaded = (‘/Users/MyUsername/Downloads/chromedriver’)Very simple yet very important step. You need your code to actually open the website you’re attempting to (”)When run, this code snippet will open the browser to your desired order to extract the information that you’re looking to scrape, you need to locate the element’s XPath. An XPath is a syntax used for finding any element on a webpage. To locate the element’s XPath, highlight the first in the list of what you’re looking for, right click, and select inspect; this opens up the developer tools. For my example, I first want to locate the NBA player names, so I first select Stephen the developer tools, we now see the element “Stephen Curry” appears as such.
This element can easily be translated to its XPath, but first, we need to remember that we aren’t just trying to locate this element, but all player names. Using the same process, I located the next element in the list, Russell Westbrook.
The commonality between these two (and all other player names) is
Russel Westbrook’s 2019/20 Salary
While inspecting these elements and translating to XPath, we can ignore style and data-value, only worrying about the laries = nd_elements_by_xpath(‘//td[@class=”hh-salaries-sorted”]’)And the list of salaries text…salaries_list = []for s in range(len(salaries)): (salaries[s])Often, when using Selenium, you’ll be attempting to retrieve data that is located on multiple different pages from the same website. In my example, has NBA salary data dating back to the 1990/91 you can see, the difference between the URL of each season is just a matter of the years being included at the end. So the URL for the 2018/19 season is and the URL for the 1990/91 season is. With that, we can create a function that loops through each year and accesses each URL individually and then puts all of the steps we’ve previously shown together for each year individually. I also pair each player with their salary for that season together, place into a temporary dataframe, add the year onto that temporary dataframe, and then add this temporary dataframe to a master dataframe that includes all of the data we’ve acquired. The final code is below!

Web Scraping using Selenium and Python – ScrapingBee
●
Updated:
08 July, 2021
9 min read
Kevin worked in the web scraping industry for 10 years before co-founding ScrapingBee. He is also the author of the Java Web Scraping Handbook.
In the last tutorial we learned how to leverage the Scrapy framework to solve common web scraping problems.
Today we are going to take a look at Selenium (with Python ❤️) in a step-by-step tutorial.
Selenium refers to a number of different open-source projects used for browser automation. It supports bindings for all major programming languages, including our favorite language: Python.
The Selenium API uses the WebDriver protocol to control a web browser, like Chrome, Firefox or Safari. The browser can run either localy or remotely.
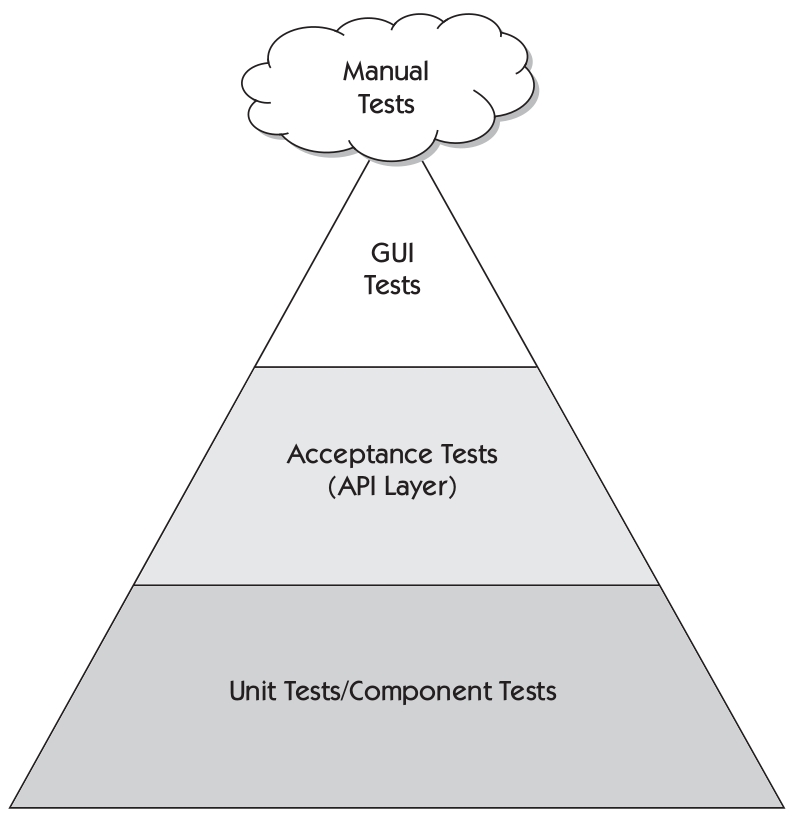
At the beginning of the project (almost 20 years ago! ) it was mostly used for cross-browser, end-to-end testing (acceptance tests).
Now it is still used for testing, but it is also used as a general browser automation platform. And of course, it us used for web scraping!
Selenium is useful when you have to perform an action on a website such as:
Clicking on buttons
Filling forms
Scrolling
Taking a screenshot
It is also useful for executing Javascript code. Let’s say that you want to scrape a Single Page Application. Plus you haven’t found an easy way to directly call the underlying APIs. In this case, Selenium might be what you need.
Installation
We will use Chrome in our example, so make sure you have it installed on your local machine:
Chrome download page
Chrome driver binary
selenium package
To install the Selenium package, as always, I recommend that you create a virtual environment (for example using virtualenv) and then:
Quickstart
Once you have downloaded both Chrome and Chromedriver and installed the Selenium package, you should be ready to start the browser:
from selenium import webdriver
DRIVER_PATH = ‘/path/to/chromedriver’
driver = (executable_path=DRIVER_PATH)
(”)
This will launch Chrome in headfull mode (like regular Chrome, which is controlled by your Python code).
You should see a message stating that the browser is controlled by automated software.
To run Chrome in headless mode (without any graphical user interface), you can run it on a server. See the following example:
from import Options
options = Options()
options. headless = True
d_argument(“–window-size=1920, 1200”)
driver = (options=options, executable_path=DRIVER_PATH)
(“)
print(ge_source)
()
The ge_source will return the full page HTML code.
Here are two other interesting WebDriver properties:
gets the page’s title
rrent_url gets the current URL (this can be useful when there are redirections on the website and you need the final URL)
Locating Elements
Locating data on a website is one of the main use cases for Selenium, either for a test suite (making sure that a specific element is present/absent on the page) or to extract data and save it for further analysis (web scraping).
There are many methods available in the Selenium API to select elements on the page. You can use:
Tag name
Class name
IDs
XPath
CSS selectors
We recently published an article explaining XPath. Don’t hesitate to take a look if you aren’t familiar with XPath.
As usual, the easiest way to locate an element is to open your Chrome dev tools and inspect the element that you need.
A cool shortcut for this is to highlight the element you want with your mouse and then press Ctrl + Shift + C or on macOS Cmd + Shift + C instead of having to right click + inspect each time:
find_element
There are many ways to locate an element in selenium.
Let’s say that we want to locate the h1 tag in this HTML:
Super title
h1 = nd_element_by_name(‘h1’)
h1 = nd_element_by_class_name(‘someclass’)
h1 = nd_element_by_xpath(‘//h1’)
h1 = nd_element_by_id(‘greatID’)
All these methods also have find_elements (note the plural) to return a list of elements.
For example, to get all anchors on a page, use the following:
all_links = nd_elements_by_tag_name(‘a’)
Some elements aren’t easily accessible with an ID or a simple class, and that’s when you need an XPath expression. You also might have multiple elements with the same class (the ID is supposed to be unique).
XPath is my favorite way of locating elements on a web page. It’s a powerful way to extract any element on a page, based on it’s absolute position on the DOM, or relative to another element.
WebElement
A WebElement is a Selenium object representing an HTML element.
There are many actions that you can perform on those HTML elements, here are the most useful:
Accessing the text of the element with the property
Clicking on the element with ()
Accessing an attribute with t_attribute(‘class’)
Sending text to an input with: nd_keys(‘mypassword’)
There are some other interesting methods like is_displayed(). This returns True if an element is visible to the user.
It can be interesting to avoid honeypots (like filling hidden inputs).
Honeypots are mechanisms used by website owners to detect bots. For example, if an HTML input has the attribute type=hidden like this:
This input value is supposed to be blank. If a bot is visiting a page and fills all of the inputs on a form with random value, it will also fill the hidden input. A legitimate user would never fill the hidden input value, because it is not rendered by the browser.
That’s a classic honeypot.
Full example
Here is a full example using Selenium API methods we just covered.
We are going to log into Hacker News:
In our example, authenticating to Hacker News is not really useful on its own. However, you could imagine creating a bot to automatically post a link to your latest blog post.
In order to authenticate we need to:
Go to the login page using ()
Select the username input using nd_element_by_* and then nd_keys() to send text to the input
Follow the same process with the password input
Click on the login button using ()
Should be easy right? Let’s see the code:
login = nd_element_by_xpath(“//input”). send_keys(USERNAME)
password = nd_element_by_xpath(“//input[@type=’password’]”). send_keys(PASSWORD)
submit = nd_element_by_xpath(“//input[@value=’login’]”)()
Easy, right? Now there is one important thing that is missing here. How do we know if we are logged in?
We could try a couple of things:
Check for an error message (like “Wrong password”)
Check for one element on the page that is only displayed once logged in.
So, we’re going to check for the logout button. The logout button has the ID “logout” (easy)!
We can’t just check if the element is None because all of the find_element_by_* raise an exception if the element is not found in the DOM.
So we have to use a try/except block and catch the NoSuchElementException exception:
# dont forget from import NoSuchElementException
try:
logout_button = nd_element_by_id(“logout”)
print(‘Successfully logged in’)
except NoSuchElementException:
print(‘Incorrect login/password’)
We could easily take a screenshot using:
ve_screenshot(”)
Note that a lot of things can go wrong when you take a screenshot with Selenium. First, you have to make sure that the window size is set correctly.
Then, you need to make sure that every asynchronous HTTP call made by the frontend Javascript code has finished, and that the page is fully rendered.
In our Hacker News case it’s simple and we don’t have to worry about these issues.
If you need to make screenshots at scale, feel free to try our new Screenshot API here.
Waiting for an element to be present
Dealing with a website that uses lots of Javascript to render its content can be tricky. These days, more and more sites are using frameworks like Angular, React and for their front-end. These front-end frameworks are complicated to deal with because they fire a lot of AJAX calls.
If we had to worry about an asynchronous HTTP call (or many) to an API, there are two ways to solve this:
Use a (ARBITRARY_TIME) before taking the screenshot.
Use a WebDriverWait object.
If you use a () you will probably use an arbitrary value. The problem is, you’re either waiting for too long or not enough.
Also the website can load slowly on your local wifi internet connection, but will be 10 times faster on your cloud server.
With the WebDriverWait method you will wait the exact amount of time necessary for your element/data to be loaded.
element = WebDriverWait(driver, 5)(
esence_of_element_located((, “mySuperId”)))
finally:
This will wait five seconds for an element located by the ID “mySuperId” to be loaded.
There are many other interesting expected conditions like:
element_to_be_clickable
text_to_be_present_in_element
You can find more information about this in the Selenium documentation
Executing Javascript
Sometimes, you may need to execute some Javascript on the page. For example, let’s say you want to take a screenshot of some information, but you first need to scroll a bit to see it.
You can easily do this with Selenium:
javaScript = “rollBy(0, 1000);”
driver. execute_script(javaScript)
Using a proxy with Selenium Wire
Unfortunately, Selenium proxy handling is quite basic. For example, it can’t handle proxy with authentication out of the box.
To solve this issue, you need to use Selenium Wire.
This package extends Selenium’s bindings and gives you access to all the underlying requests made by the browser.
If you need to use Selenium with a proxy with authentication this is the package you need.
pip install selenium-wire
This code snippet shows you how to quickly use your headless browser behind a proxy.
# Install the Python selenium-wire library:
# pip install selenium-wire
from seleniumwire import webdriver
proxy_username = “USER_NAME”
proxy_password = “PASSWORD”
proxy_url = ”
proxy_port = 8886
options = {
“proxy”: {
“”: f”{proxy_username}:{proxy_password}@{proxy_url}:{proxy_port}”,
“verify_ssl”: False, }, }
URL = ”
driver = (
executable_path=”YOUR-CHROME-EXECUTABLE-PATH”,
seleniumwire_options=options, )
(URL)
Blocking images and JavaScript
With Selenium, by using the correct Chrome options, you can block some requests from being made.
This can be useful if you need to speed up your scrapers or reduce your bandwidth usage.
To do this, you need to launch Chrome with the below options:
chrome_options = romeOptions()
### This blocks images and javascript requests
chrome_prefs = {
“fault_content_setting_values”: {
“images”: 2,
“javascript”: 2, }}
chrome_options. experimental_options[“prefs”] = chrome_prefs
###
chrome_options=chrome_options, )
Conclusion
I hope you enjoyed this blog post! You should now have a good understanding of how the Selenium API works in Python. If you want to know more about how to scrape the web with Python don’t hesitate to take a look at our general Python web scraping guide.
Selenium is often necessary to extract data from websites using lots of Javascript. The problem is that running lots of Selenium/Headless Chrome instances at scale is hard. This is one of the things we solve with ScrapingBee, our web scraping API
Selenium is also an excellent tool to automate almost anything on the web.
If you perform repetitive tasks like filling forms or checking information behind a login form where the website doesn’t have an API, it’s maybe* a good idea to automate it with Selenium, just don’t forget this xkcd:

Introduction to Web Scraping using Selenium – Medium
In this tutorial you’ll learn how to scrape websites with Selenium and the name suggests, this is a technique used for extracting data from websites. It is an automated process where an application processes the HTML of a Web Page to extract data for manipulation such as converting the Web page to another format and copying it into a local database or spreadsheet for later retrieval or Cases of Web Scraping:There are many uses for Web Scraping but I will mention just a few:Contact ScrapingData MiningOnline Price Change Monitoring & Price ComparisonProduct Review Scraping: to watch your competitionGathering Real Estate ListingsWeather Data MonitoringWebsite Change DetectionResearchTracking Online Presence and ReputationWeb Data IntegrationWhat is Selenium? Selenium is a Web Browser Automation imarily, it is for automating web applications for testing purposes, but is certainly not limited to just that. It allows you to open a browser of your choice & perform tasks as a human being would, such as:Clicking buttonsEntering information in formsSearching for specific information on the web pagesPoint To NoteIt is important to note that Web scraping is against most websites’ terms of service. Your IP address may be banned from a website if you scrape too frequently or this tutorial we will build a web scraping program that will scrape a Github user profile and get the Repository Names and the Languages for the Pinned you would like to jump straight into the project, here is link to the repo on Github. this project we will use Python3. x. You can also use Python2. x but there may be some slight differences in the If you have Python 2 >=2. 7. 9 or Python 3 >=3. 4 installed from, you will already have pip will also use the following packages and lenium package — used to automate web browser interaction from PythonChromeDriver — provides a platform to launch and perform tasks in specified rtualenv — to create an isolated Python environment for our Selenium-Python ReadTheDocs oject SetUpCreate a new project folder. Within that folder create an file. In this file, type in our dependency reenshot of project folder up your command line & create a virtual environment using the basic command:$ virtualenv webscraping_exampleNext, install the dependency into your virtualenv by running the following command in the terminal:$(webscraping_example) pip install -r Import Required ModulesWithin the folder we created earlier, create a file and include the following code selenium import webdriver from import By from import WebDriverWait from pport import expected_conditions as EC from import TimeoutException1st import: Allows you to launch/initialise a browser. 2nd import: Allows you to search for things using specific parameters. 3rd import: Allows you to wait for a page to load. 4th import: Specify what you are looking for on a specific page in order to determine that the webpage has loaded. 5th import: Handling a timeout new instance of Chrome in Incognito modeFirst we start by adding the incognito argument to our = romeOptions()d_argument(“ — incognito”)Next we create a new instance of owser = (executable_path=’/Library/Application Support/Google/chromedriver’, chrome_options=option)One thing to note is that the executable_path is the path that points to where you downloaded and saved your The RequestWhen making the request we need to consider the following:Pass in the desired website plement a Try/Except for handling a timeout situation should it our case we are using a Github user profile as the desired website (“)Next we specify a timeout period and the Try/Except:# Wait 20 seconds for page to loadtimeout = 20try: WebDriverWait(browser, timeout)(sibility_of_element_located((, “//img[@class=’avatar width-full rounded-2′]”)))except TimeoutException: print(“Timed out waiting for page to load”) ()NB: We wait until the final element [the Avatar image] is loaded. The assumption is that if the Avatar is loaded, then the whole page would be relatively loaded as it is among the last things to pass in the tag and its class to the WebDriverWait() function as the XPATH in the code snippet aboveGet The ResponseOnce we make a request and it is successful we need to get a response. We will break the response into 2 and combine it at the end. The response is the title and language of the pinned repositories of our Github start by getting all titles for the pinned repositories. We are not just getting pure titles but we are getting a selenium object with selenium elements that include the titles. # find_elements_by_xpath returns an array of selenium objects. titles_element = nd_elements_by_xpath(“//a[@class=’text-bold’]”)# use list comprehension to get the actual repo titles and not the selenium = [ for x in titles_element]# print out all the (‘titles:’)print(titles, ‘\n’)NB: The tag and its class structure is the same for all the titles of the pinned repositories hence we can find all the elements using this structure as a pass in the tag and its class to the find_elements_by_xpath() function in the code snippet aboveWe will now get all the languages for the pinned repositories. It is similar to what we have above for the nguage_element = nd_elements_by_xpath(“//p[@class=’mb-0 f6 text-gray’]”)# same concept as for list-comprehension nguages = [ for x in language_element]print(“languages:”)print(languages, ‘\n’)NB: The
tag and itsclass structure is the same for all the languages of the pinned repositories hence we can find all the elements using this structure as a pass in the
tag and its class to the find_elements_by_xpath() function in the code snippet aboveCombine the responses using zip functionThe final step is to pair each title with its corresponding language and then print out each pair. We achieve this using the zip function which matches the two elements from the 2 different arrays, maps them into tuples and returns an array of title, language in zip(titles, languages): print(“RepoName: Language”) print(title + “: ” + language, ‘\n’)Run the programFinally execute the program by running it directly in your IDE or by using the following command:$ (webscraping_example) python the program runs it should launch the Chrome browser in incognito mode with the message “Chrome is being controlled by automated test software” is being controlled by automated test the terminal or in your IDE, you should see the printed out response in this format:TITLES:[‘Github-Api-Challenge’, ‘python-unit-tests-tutorial’, ‘KenyawebApp’, ‘filamu-app’]LANGUAGES:[‘Java’, ‘Python 1 1’, ‘Java’, ‘Java’]RepoName: LanguageGithub-Api-Challenge: JavaRepoName: Languagepython-unit-tests-tutorial: Python 1 1RepoName: LanguageKenyawebApp: JavaRepoName: Languagefilamu-app: JavaYou now have the foundational skills necessary to scrape you for this post was helpful, please click the clap button below a few times to show your support. ⬇⬇
Frequently Asked Questions about selenium web scraping
Is Selenium good for web scraping?
Selenium wasn’t originally designed for web scraping. In fact, Selenium is a web driver designed to render web pages for test automation of web applications. This makes Selenium great for web scraping because many websites rely on JavaScript to create dynamic content on the page.Dec 16, 2020
Why is Selenium used in web scraping?
What is Selenium: – Selenium is an open-source web-based automation tool. Selenium primarily used for testing in the industry but It can also be used for web scraping. We’ll use the Chrome browser but you can try on any browser, It’s almost the same.Aug 30, 2020
Is BeautifulSoup faster than Selenium?
One of the ways to compare selenium vs BeautifulSoup is the performance of both. … This is a con of BeautifulSoup because the programmer needs to know multithreading properly. Scrapy is faster than both as it makes use of asynchronous system calls. So it’s faster and performs better than other libraries.Feb 10, 2021