What Does a Server Connection Timeout Mean? – Small …
A server connection timeout means that a server is taking too long to reply to a data request made from another device. Timeouts are not a reply message: they show up when there isn’t a reply and a server request is not fulfilled in a predetermined length of time. A server connection timeout error does little to tell you what went wrong or why the error happened: it just identifies that the error occurred. Timeout errors can happen for a number of reasons. The server, the requesting device, the network hardware and even an Internet connection can be at fault. Timeouts The purpose of a server timeout is to prevent a device from endlessly waiting for a sever to respond. Server timeouts can occur when using a Web browser to view a site, connecting to an online service with a game or running a program update, among other situations. A task that has timed out or undergone a timeout is considered incomplete or failed. Essentially, the device that made the initial request for data from another device “gives up” on waiting for that information to be sent when a timeout occurs. According to Microsoft, Internet Explorer 8 defaults the timeout duration at 60 minutes. The timeout duration varies depending on which program makes the data request from the server and can range from a few seconds to a few hours. Server Doesn’t Exist Server timeout errors can be caused when a program tries to connect to a server that doesn’t exist. The server could be offline or the program could have the wrong address. The server could be put back online or moved to the request location, but as far as the device is concerned it’s looking for something that isn’t there. These errors can be fixed by correcting the address if the server exists. Network Infrastructure Error A request from a device has to pass through multiple checkpoints on its way to the server. If any of these checkpoints is too busy, the request may be dropped. For example, a request to load a website in a Web browser may time out when connecting through a home network because the router is overtaxed with requests from other computers and devices on the network for other servers. Network Hardware Error A server request may time out because it was blocked from ever leaving the computer or network and never got to the server. Firewall and router port blocking settings can prevent outgoing requests to servers. Reconfiguring the Firewall or router to allow the request to pass will fix the problem. Data Request Error It’s possible that the server suffers an error pulling up the requested data and is unable to send anything back to the computer. When this occurs, the request makes it to the server, but the server gives up and never sends anything back. Data request errors can be resolved by sending the request again. References Writer Bio Dan Stone started writing professionally in 2006, specializing in education, technology and music. He is a web developer for a communications company and previously worked in television. Stone received a Bachelor of Arts in journalism and a Master of Arts in communication studies from Northern Illinois University.

How to Fix the ERR_CONNECTION_TIMED_OUT Error – Kinsta
Are you seeing the “ERR_CONNECTION_TIMED_OUT” error in your browser? Not a very helpful error message, is it? If you are a daily WordPress user, then it’s always good to be aware of common errors like these that might prevent you from getting access to your website.
In today’s post, we’re going to take a deep dive into the “ERR_CONNECTION_TIMED_OUT” error and examine why you might see this and what you can do to fix it quickly. Simply put, it’s an indication that the system is unavailable and the time given for one to connect has elapsed, and now the request has timed out. But what does that actually mean?
Let’s find out!
We’ve taken our knowledge of effective website management at scale, and turned it into an ebook and video course. Click here to download the The 2020 Guide to Managing 40+ WordPress Sites!
What is the ERR_CONNECTION_TIMED_OUT Error?
An ERR_CONNECTION_TIMED_OUT error typically means there is something wrong with your local network connection. However, that’s not always the case.
According to the WordPress support documentation, a connection timed out error appears when your website is trying to do more than your server can manage. It’s particularly common on shared hosting where your memory limit is restricted.
When you visit a website and it doesn’t load, your browser will try for around 30 seconds or so until it terminates the connection. After which it will return an “ERR_CONNECTION_TIMED_OUT” error, indicating a communication problem. In Google Chrome you might see this as “This site can’t be reached. took too long to respond. ”
ERR_CONNECTION_TIMED_OUT error in Chrome
Due to all the different web browsers, operating systems, and servers, the error can present itself in a number of different ways. But most of them have the same or similar meaning. “ERR_NETWORK_CHANGED” and “ERR_CONNECTION_REFUSED” are two very closely related errors that can usually be solved with the same troubleshooting steps below.
Another common error code that appears under ‘This site can’t be reached’ is the DNS_PROBE_FINISHED_NXDOMAIN, which is a DNS error that essentially means the domain that was requested doesn’t exist.
Below are a few examples of how the error might present itself in different browsers.
Mozilla Firefox
In Mozilla Firefox the error will show as “The connection has timed out. ” The server at is taking too long to respond.
ERR_CONNECTION_TIMED_OUT error in Firefox
Microsoft Edge
In Microsoft Edge, the error will show as “Hmmm… can’t reach this page. ” In Edge, however, it does also contain the “ERR_CONNECTION_TIMED_OUT” error.
ERR_CONNECTION_TIMED_OUT error in Edge
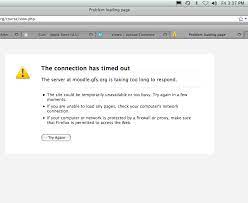
Safari
In Safari, the error will show as “Safari Can’t Open the Page. Safari can’t open the page because the server where this page is located isn’t responding. ”
ERR_CONNECTION_TIMED_OUT error in Safari
How to Fix the ERR_CONNECTION_TIMED_OUT Error
Where should you start troubleshooting if you see this error on your WordPress site? Without a great deal of context, it can sometimes be frustrating and overwhelming where to even begin. Typically these are either client-side problems (issues with your network connection or firewall) or an issue with the server at which the site is hosted (memory limits, execution times, etc. ).
1. Check Your Connection
Google Chrome, Firefox, and Edge all recommend that you should check your network connection. While this might sound obvious, they all point to checking your connection first as it’s one of the most common reasons for the error. Here are a few things we recommend:
Restart your home or office router. This only takes a few minutes and solves more problems than a lot of people would like to admit. To completely power cycle it, disconnect the power supply and then wait 30 seconds before plugging it back in.
Check to see if you’re on a bad or slow wifi connection. This is a common occurrence on busy public wifi hotspots such as coffee shops or airports.
2. Disable Firewall and Antivirus Software Temporarily
Firewalls and antivirus software are intended to protect users and their systems. They scan your device regularly and automatically block any suspicious activity. However, this type of security can at times lead to connection issues.
This is because firewalls can often block pages they don’t need to or reject content that is completely safe. We’ve seen this happen many times with software like AVG. To check whether this is the case for you, try disabling your firewall and antivirus programs. Of course, this is only advised if you know for sure that the site you’re intending to visit is safe.
Additionally, you should only disable this kind of software temporarily. Switch it back on after you’ve finished checking to see whether the error has been resolved, so you don’t become vulnerable to attacks. If you repeatedly encounter errors because of your firewall or antivirus software, you may want to consider changing what you’re using.
These types of tools also have what is called a “false-positive” report you can fill out. If you’re 100% positive that a site your visiting is blocked and shouldn’t be, you can let the software developer know. Here are a few quick links:
AVG false positive form
Norton false positive form
Sophos false positive form
3. Disable Proxy Settings
Sometimes you might see the ERR_CONNECTION_TIMED_OUT error if you are utilizing a proxy service. This is usually pretty rare, especially on the client-side. However, one might have been set without you even knowing it. To disable or check to ensure no proxy settings are enabled, follow these steps.
Access the Settings menu in your Chrome browser. This will open up the complete menu of options. Under the System section (you’ll need to click Advanced at the bottom to see this), you should find an entry titled Open proxy settings. By selecting it, you’ll be taken to the corresponding menu:
Open Proxy Settings in Chrome
Your next step depends on the system you’re currently using. Windows users will want to click on LAN Settings and uncheck the Use proxy server for LAN option. If you’re a Mac user, you should immediately find yourself in the relevant menu. You’ll then have to uncheck all selectable proxy protocols and check to see if the ERR_CONNECTION_TIMED_OUT message has been resolved.
Uncheck proxies on Mac
If you’re on Windows, you will see a “Local Area Network (LAN) Settings” window appear. You will want to confirm that the “Use a proxy server for your LAN” option is unchecked.
Disable Chrome proxy settings in Windows
The same goes if you’re using a VPN like ExpressVPN or TunnelBear. Make sure you’re not connected by accident.
4. Change DNS Servers
The next thing you can try is changing your DNS servers. By default, DNS servers are automatically assigned by your ISP. But you could try temporarily changing these to a public DNS server, such as Google or Cloudflare.
Some prefer to use Google’s public DNS (8. 8. 8 and 8. 4. 4) long-term due to them sometimes being more reliable.
Cloudflare also offers secure and blazing fast free DNS (1. 1. 1 and 1. 0. 1) which we will be using in this example. If you want to use Google’s the steps are the same, you simply replace the DNS server addresses with Googles.
Tip: If you’re already using a free DNS server and having issues, removing it and defaulting back to your ISP’s DNS servers also sometimes fix things.
Google and Cloudflare aren’t perfect 100% of the time and there have been a few instances where we’ve noticed switching back has resolved the issue. This is especially true if you’re using a Wifi hotspot in an airport or coffee shop.
Windows
In Windows simply open up Command Prompt by pressing the Windows logo key and R. Then type “control panel” and hit Enter.
Run Control Panel Windows
Click on “Network and Internet” and then “Network and Sharing Center. ” On the left-hand side, click on “Change Adapter Settings. ”
Change adapter settings
Right click on your current connection, this will either be Local Area Connection or Wireless Network Connection based on how you’re connecting. Then click on “Properties. ”
Want to know how we increased our traffic over 1000%?
Join 20, 000+ others who get our weekly newsletter with insider WordPress tips!
Subscribe Now
Wireless connection properties
Select Internet Protocol Version 4 (or Version 6 if desired) and click on “Properties. ”
IPV 4 properties
Make a note of any existing settings in case you need to revert back. Click “Use the following DNS server addresses. ” Enter the following, or replace the existing with these:
For IPv4: 1. 1 and 1. 1
For IPv6: 2606:4700:4700::1111 and 2606:4700:4700::1001
DNS server addresses
Click OK, then Close. Restart your browser.
Mac
To change DNS servers on a Mac, go to System Preferences…
Mac system preferences
Click on the network icon and then click “Advanced. ”
Mac network advanced
Click on the “DNS” tab.
Mac DNS
Then add Cloudflare’s DNS server addresses.
5. Flush/Renew DNS
You can also try flushing your local DNS cache. This is similar to clearing your browser cache. It could be that the site you’re trying to visit isn’t resolving to the correct IP address. If you’ve just migrated your WordPress site to a new host, it’s important to wait for things to fully propagate. This can sometimes take up to 24 hours, although it can be as little as a few minutes. This depends on your DNS provider and the TTL value of your DNS records.
In Windows simply open up Command Prompt and enter the following:
ipconfig /flushdns
Command prompt – flush DNS
You should see a “Successfully flushed the DNS resolver Cache” if it worked.
For macOS users, you can enter the following in the terminal:
dscacheutil -flushcache
Mac flush cache
Note: There is no success message on Macs.
6. Check Your Hosts File
Every computer has what they call a local hosts file. This is a file that contains manual DNS entries which are mapped to specific IP addresses. Typically this is only edited when you want to preview your DNS before switching over domains to a new host. Or perhaps you have a local development site running using a tool like DevKinsta, Vagrant or Docker.
There is a multitude of different ways this file could have been changed or edited. Therefore, it’s always good to check to ensure the website you’re trying to access isn’t in there. Just follow the steps below.
The hosts file typically requires additional access. So the first step is to open up your text editor as an administrator. Simply click on your start menu, search for your text editor, right-click on it and select “Run as administrator. ” This can be done in any text editor such as Notepad, Notepad++, Atom, etc. We are using Sublime in our example below.
Run text editor as administrator
Within your text editor click File → Open and browse to the following location:
C:\Windows\System32\drivers\etc\
Click on the hosts file and “Open. ”
Open hosts file
Double-check and make sure the website you’re trying to visit isn’t listed in there. If it is, remove it.
To check your hosts file on a Mac, we recommend getting Gas Mask. It’s a free application which can be used as hosts file manager, hosts files editor, and switch between them. It makes everything quick and easy! Otherwise, you can follow the steps below to edit your hosts file on Mac manually.
Go to Utilities and then click on “Terminal. ”
Mac utilities terminal
Enter in the following command and press Enter (you will most likely be prompted for your administrator password as well).
sudo nano /private/etc/hosts
Double-check and make sure the website you’re trying to visit isn’t listed in your hosts file. If it is, remove it.
Edit hosts file on Mac
7. Check the DNS of Your Domain
You should also verify that the DNS of your domain is correctly pointed to your hosting provider. If you’re a Kinsta client we have an in-depth post on how to point your domain and or DNS to Kinsta. If you recently migrated your WordPress website to a new host, it could be the DNS was cached incorrectly on your computer. In which case, step 5 above should resolve that. Or it may simply be too soon and you need to wait a few hours for the DNS to fully propagate.
8. Clear Browser Cache
Web browsers store information in cache on your computer. This includes your browsing history, saved login data, and cookies – all of which are recorded in order to load the relevant pages more quickly the next time they’re visited.
Although they’re useful, caches can cause numerous issues when they become outdated. Fortunately, this problem is easily solved by clearing your cache.
But before you do that, you can easily check to see if it’s a browser cache issue by first opening up your browser in incognito mode. Or you can try a different browser. If you’re still seeing the error, then you will want to proceed with clearing your cache.
In this example, we’ll be using Google Chrome. Begin by opening up the primary menu (in the top-right corner of your browser window). From there, select More Tools: You can then click on Clear browser data.
Chrome clear browsing data
On the resulting page, you’ll need to make sure that all listed file categories are selected. If they aren’t, Chrome won’t be able to empty the entire cache. Instead, it will simply remove the most recent entries, which won’t result in the desired effect:
Clear browsing data
An alternative method of completing this process is to enter the following URL into your address bar:
chromesettings/clearBrowserData
The resulting screen should grant you access to the same options we’ve outlined above. Here are some other helpful links for clearing cache.
How to Force Refresh a Single Page for All Browsers
How to Clear Cache for Google Chrome
How to Clear Cache for Mozilla Firefox
How to Clear Cache on Mac (Safari)
How to Clear Cache for Internet Explorer
How to Clear Cache for Microsoft Edge
How to Clear Cache for Opera
9. Look at The Maximum Execution Time
The rest of the troubleshooting steps we’ll be diving into are those that have to do with the configuration of your WordPress site or server that may help fix the “ERR_CONNECTION_TIMED_OUT” error.
The first is the maximum execution time set for your site. On most servers, the default time is set to 30 seconds. This is the amount of time a PHP script is allowed to run (after which it times out). On shared hosts, this is typically set low or left at the default.
You can’t easily modify this from WordPress as the file is located on your server. To modify this, we recommend reaching out to your hosting provider to see if they can help. At Kinsta, we set the default maximum execution time to 300 seconds.
If you want to try and modify this yourself, it can usually be done with one of the following options. Both will depend on how your hosting provider configures their servers.
Option 1 – Modify Max Execution Time in File
If you have a file in your home directory, find the max_execution_time parameter and modify it. For example, if it’s set to 30 seconds, you can increase it to 300 seconds.
max_execution_time = 300
Option 2 – Modify Max Execution Time in. htacess File
If the above option doesn’t work, you might be able to change it within your. htaccess file. Just like with the file, this is typically located within your home directory. Place the following in the top of your. htaccess file:
php_value max_execution_time 300
10. Temporarily Disable Your Plugins
As with most WordPress errors, a plugin can definitely be the root of the problem. To determine if that’s what’s happening, you’ll need to disable all of your site’s plugins. However, if you’re getting the “ERR_CONNECTION_TIMED_OUT” error it means you don’t have access to your WordPress admin area. This means you will need to SFTP into your site. We recommend using FileZilla.
Once your SFTP client is ready, connect to your website through it and navigate to your WordPress root folder. In case you can’t find it, it’s usually called public_html, html, public, www, or your site’s name. If you’re a Kinsta client, it’s your public folder.
WordPress root folder SFTP
Open that folder, and navigate to the wp-content directory. Inside, you’ll see a folder called plugins, which contains individual subdirectories for each of the plugins installed on your site (both active and inactive).
What you’re going to do now is right-click on the plugins folder, and rename it to something else. We recommend or activated, so you can easily recognize it later.
WordPress plugins folder renamed
WordPress will now not be able to find any of your plugins. When that happens, it will automatically disable those plugins.
Now, try accessing your WordPress dashboard. If the timeout error is gone, then you can assume that one of your plugins was the culprit. All you have to do is figure out which one was at fault.
Return to the wp-content directory, and rename your original plugins folder correctly. Then, you’ll need to disable each of your plugins one by one, until you find the culprit.
To do this, open the wp-content/plugins directory. Inside, you’ll find one folder for each of your plugins. The process you’re going to follow is much the same as before:
Start with the first folder, and rename it to anything you like.
Check your website to see if the error is gone.
If it isn’t, return the plugin folder from the previous step to its original name.
Move on to the next plugin on your list, repeating the above steps.
This process can take a while if you have a lot of plugins, but it’s vital to check each plugin in turn. If at any point you identify the plugin that’s causing the error, you can uninstall it or replace it with another tool.
If you make it to the end of these steps without finding a solution, you can move on to the next stage of troubleshooting.
11. Temporarily Revert to Default Theme
Now that you’ve ruled out your plugins as the cause of the timeout error, it’s time to do the same with your active theme. In fact, your theme could also be creating compatibility issues.
Unfortunately, the process doesn’t work the same as above. WordPress won’t revert to the default theme if simply rename the theme folder, you would end up with an error like “The theme directory “theme name” does not exist. ” Or if you try to rename the entire theme directory folder, you end up with “ERROR: The themes directory is either empty or doesn’t exist. Please check your installation. ”
Therefore, you need to access your WordPress database by logging into phpMyAdmin. If you’re a Kinsta client, this can be found within the “Info” section of the MyKinsta dashboard.
MyKinsta phpMyAdmin
Click into the “wp_options” table, then click on the “Search” tab. You will want to search under the “option_name” for template.
phpMyAdmin wp_options table
Under the “option_value” column you will see the current name of your theme. Change this to one of the default themes, such as “twentynineteen. ”
wp_options template name
Check your website again to see if this has fixed the error. If it did, it simply means it’s a problem with your WordPress theme and you might want to try reinstalling it or reverting to your most recent backup.
12. Increase the Memory Limit
The WP_MEMORY_LIMIT parameter allows you to specify the maximum amount of memory that can be consumed by PHP. If you are using shared hosting, it’s most likely set to a low value such as 64M. At Kinsta, we set the default memory limit to 256M.
You can increase the memory limit by adding the following to your file. This must be placed above the inclusion.
define( ‘WP_MEMORY_LIMIT’, ‘256M’);
WP_MEMORY_LIMIT in
Not sure what your current PHP memory limit is set to? If you have access to your WordPress dashboard and are running WordPress 5. 2 or above, you can see the PHP memory limit under the “Site Health” tool.
WordPress site health PHP memory limit
Can’t reach your site because of the *ERR_CONNECTION_TIMED_OUT* error message? Here are 12 possible ways to fix it! Click to Tweet
Summary
Connection and timeout errors are never fun to troubleshoot, but hopefully, you have a little more knowledge in your toolbelt now to help resolve it quickly.
It’s important to remember that the “ERR_CONNECTION_TIMED_OUT” error be a result of a client-side problem such as your network connection, or an issue with the server where your WordPress site is hosted. Have any other tips to resolve this error? Let us know below in the comments.
(Suggested reading: Learn how to fix the ERR_CACHE_MISS error in Chrome)
Save time, costs and maximize site performance with:
Instant help from WordPress hosting experts, 24/7.
Cloudflare Enterprise integration.
Global audience reach with 28 data centers worldwide.
Optimization with our built-in Application Performance Monitoring.
All of that and much more, in one plan with no long-term contracts, assisted migrations, and a 30-day-money-back-guarantee. Check out our plans or talk to sales to find the plan that’s right for you.

How to resolve a web “Connection timed out” error
“Connection timed out” is an error that occurs as a result of a script exceeding the maximum timeout value. If a client connection does not receive a response from the server after approximately 30 to 60 seconds the load balancer will close the connection and the client will immediately receive the error message. In most cases, the script will continue to execute until it reaches completion, throws an error, or times out on the server, but the client will not see the page load as expected and will instead receive this you’re seeing timeouts intermittently I would recommend auditing your code, because that likely means it could use optimization or needs to be broken down into smaller pieces. For instance, if you were inserting several records into a database, try inserting a few at a time and then sending back a response to the client’s browser. For longer running scripts in PHP you can use the ‘exec’ function to run scripts in the background and have the script write its status to a database or a file. Then you could use AJAX to display a loading bar and check the script’s status. Once it’s completed you can then remove the loading bar and proceed to a completion page. This is just an example, but the concept is good for anything. Another option is to run the script as a cron job using PHP or Perl instead of HTTP, which circumvents the load balancer’s timeout. The bottom line when it comes to code causing this error is that data must be sent back to the client’s browser to keep the connection alive. So regardless of what sort of processing a page is doing it must return data frequently or the load balancer will assume the connection has been dropped and will forcefully terminate it. Another common cause is that your site is trying to load files that don’t exist (404 errors). This dramatically slows a site down and in rare cases can cause a timeout. More commonly a site that is loading data from an external location can see load issues causing a timeout. For instance, if your site relies on Google Analytics,, or PayPal and for some reason these corresponding services go down or begin responding slowly, your site will see a performance hit that in some cases can cause the page not to load or to load intermittently. Keep in mind that all sorts of plugins for content management systems like WordPress and Joomla use third-party services behind the scenes, such as and Twitter. It’s also a possibility that the script simply uses a heavy amount of resources. If this is a PHP site you may need to try increasing the memory limit-which defaults to 32MB-to something more appropriate for your site, such as 64M or even 128M in extreme cases. There is a knowledge base article on that here:If you’re not familiar with using an. htaccess file-as the above article requires-you may take a look at these articles:In extremely rare cases you can see this message due to an invalid cookie being stored by your browser, which will cause you to see the error message on pages that initiate a session on your site (such as login or member pages–or sometimes even your homepage). Although rare, it’s a good idea to clear your browser cache and try the page again to verify that this is not the case.
Frequently Asked Questions about what does connection to server timed out mean
How do I fix connection to server timeout?
How to Fix the ERR_CONNECTION_TIMED_OUT ErrorCheck Your Connection. Google Chrome, Firefox, and Edge all recommend that you should check your network connection. … Disable Firewall and Antivirus Software Temporarily. … Disable Proxy Settings. … Change DNS Servers.May 26, 2021
Why does it say connection timed out?
“Connection timed out” is an error that occurs as a result of a script exceeding the maximum timeout value. If a client connection does not receive a response from the server after approximately 30 to 60 seconds the load balancer will close the connection and the client will immediately receive the error message.Dec 31, 2013
How do I fix my WiFi timeout?
Restart your wireless router.Unplug the router from the electrical outlet and make sure the lights on the router go out.Wait 30 seconds.Plug the router back in and wait 30 seconds for all the lights to come back on.