Best DNS Servers for PS4 and Gaming: Improve Speed
Useful for gamers
It’s Google but NOT always!
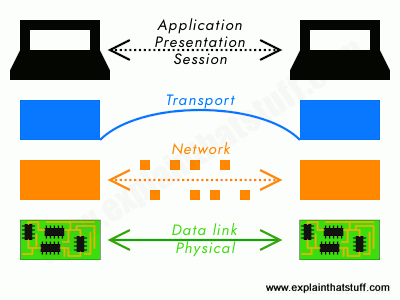
Domain Name System (DNS) enables the conversion of text addresses from the web servers into an IP address and vice versa. You can also look at DNS as an intermediary that will enable us to view a website by keying on an easy-to-understand textual address rather than the actual internet address in the form of a numerical IP address.
We will NOT go into deep technical detail on what a DNS is, instead we will give a general layout and what are the best DNS for PS4 around the world.
Using primary and secondary DNS for PS4 yields many benefits:
Faster pages loads are possible thanks to the low query times
Improved security with the use of firewalls and phishing protection based on the DNS
There is the provision of parental control in the PS4 DNS settings
Your internet connection will be improved by the servers that are close to your geographical location
A reliable connection
Reduce Jitter, Ping, and Packet loss
As you can see, it can do a lot for your gaming experience, as such we strongly advise that you consider switching your default one provided by ISP. For Gamers, DNS for PS4 will improve your connection speed, acquire better connections to host, achieve higher download speeds all of which getting a better gaming experience.
Consider this when changing your DNS
When people decide that they want to change their DNS, it is because they want to improve either security or performance or actually both at the same time! Google can help you achieve this. There are many paid services in the market that you can choose from but sometimes the freebies can get the job done.
Below are some three factors that you should consider when you want to change to a DNS server for PS4.
Default DNS vs. third-party DNS
When you are surfing the web, your ISP will use its default network’s DNS to connect to the Web. Your ISP can collect data on you and your internet activity. This is also possible for a third party DNS. However, it becomes more difficult to attribute the connection to specific people or households.
Free DNS vs. paid DNS
Aside from the pricing differential of these two, the free settings will typically have fewer features than the paid versions. The paid DNS for PS4 will offer security that is more advanced and with better performance functionality. Also, they come with better customer support and their system settings are more customizable. In general terms, however, a free service will work for most purposes.
Public DNS server vs. private DNS
The general population uses public DNS which is typically offered by the Internet Service Provider or a dedicated DNS provider. Companies who want to give their employees easier access to internal-only websites or IP addresses will use the private DNS. When using an internet connection at home, you are on a public DNS.
Find the best DNS for your PS4 and Xbox
Three approaches are recommended when selecting which is the best DNS for PS4 for you.
Here’s the first one:
Approach 1: Picking from our provided list of best DNS Servers
Just choose the one you like from our list. DNS servers such as Smart DNS ande Google DNS for PS4 has built a great reputation in speed and reliability and will often beat the DNS servers from UK Broadband providers in performance (Smart DNS and Google are likely the fastest one available).
Provider
DNS servers
Smart DNS
Available on FAQ page
Google
8. 8. 4. 4
8. 8
Cloudflare
1. 1. 1
1. 0. 1
OpenDNS
208. 67. 222. 222
208. 220. 222
Quad9
9. 9. 9
149. 112. 112
Level3
4. 2. 1
4. 2
4. 3
4. 4
4. 5
4. 6
Sprintlink
204. 117. 214. 10
199. 252. 10
NTT
129. 250. 35. 250
129. 251
Comodo Secure
8. 26. 56. 26
8. 20. 247. 20
Verisign
64. 6. 64. 6
64. 65. 6
Approach 2: Measuring ping from selected DNS servers
You can measure the ping to a range of Public DNS servers and choose the PS4 DNS setting that has the lowest pings. This should be an indication of which DNS for PS4 and Xbox is closest to you.
The use of a DNS that is at a closer geographical location to you is an advantage. This minimizes:
The time of delay when waiting for the DNS server to receive your DNS requests
The time of delay when waiting for the DNS server to send you a response to your request
You can, therefore, measure the ping to help guide your choice. Measuring the ping can be done on both a computer or a mobile device.
You can find the ping results below.
Ping (Best to worst)
The IP of DNS server
Average ping (ms)
Minimum ping (ms)
Maximum ping (ms)
SmartDNS
6. 7
6. 6
6. 8
4. 2 (level3)
7. 2
7. 5
129. 250 (NTT)
7. 0
7. 6
4. 1 (level3)
8. 5 (level3)
7. 6 (level3)
7. 4
9. 9 (Quad9)
6. 9
4. 3 (level3)
4. 4 (level3)
8. 4
204. 10 (Sprintlink)
129. 251 (NTT)
199. 10 (Sprintlink)
8. 0
9. 0
8. 26 (Comodo)
8. 6
9. 5
149. 112 (Quad9)
11. 1
10. 8
11. 4 (Google)
11. 6
12. 8 (Google)
12. 4
208. 222 (OpenDNS)
11. 7
208. 222 (OpenDNS)
12. 7
8. 20 (Comodo)
12. 1
12. 8
64. 6 (Verisign)
12. 9
11. 9
17. 6
1. 1 (Cloudflare)
14. 9
14. 5
15. 4
1. 1 (Cloudflare)
15. 0
16. 2
64. 6 (Verisign)
17. 3
15. 8
22. 2
Note that measuring ping is useful to minimize delays in transmission but the results cannot tell you about any processing delays that take place on the server itself when it performs a DNS lookup.
This is where the DNS Benchmark program can be very handy.
Approach 3: Installing and using the DNS Benchmark Program (For Windows users)
There is the DNS Benchmark software which you can use to effectively measure and analyze the wide spectrum of public DNS for PS4 and identify which is the best for your location.
Side note: (DNS Benchmark, however, does not work with macOS and the program that did, Namebench, has not been developed since 2010…)
It offers benchmarks; “Namebench PS4” and “Namebench Xbox One” which can be used to test the DNS for PS4. Namebench was a small side project that Google engaged in which was given to the public for free. Even though the “Namebench PS4” and “Namebench Xbox One” DNS benchmarks have not been updated since 2010, the system still works well for the intended purpose.
The Gibson Research Corporation website has its Benchmark program that will perform a detailed evaluation and compare the operational performance and reliability of over 200 DNS servers. It uses look-ups to analyze the total delays to your location.
The Best DNS for PS4 and Xbox
After taking you through the need for a DNS for PS4 to get the best IP address, we now show you, in our own opinion, which is the best DNS for PS4 and Xbox. All the services that we have listed below are all capable of high performance but it is their different peculiarities that set them apart.
Smart DNS enables quick load times and requires almost no help to set up.
Smart DNs is a fairly fresh service compared to the heavyweights in this category. It was founded in 2013.
Visit Smart DNS here.
2. Google Public DNS
The core benefits Google for gaming are privacy and transparency.
The primary and secondary DNS servers are 8. 8 and 8. 4 respectively.
This DNS for gaming is simple to use and an effective replacement for the default that you have been using. Google DNS for PS4 will enable the best IP address for gaming giving you a steady connection that also runs seamlessly. This is why Google Public server has been considered the best for gaming.
It will log the entire IP data of the querying device for about 24 to 48 hours for troubleshooting and diagnosis. Personally identifiable information and locations details will be dropped and or reduced by the ‘permanent’ logs and just a random sample of this will remain undeleted after a fortnight.
3. Cloudflare
The Cloudflare DNS offers you impressive performance, airtight levels of privacy, and a community forum for technical support.
The primary and secondary DNS servers are 1. 1 and 1. 1.
Cloudflare has a content delivery network that is highly respected among cybersecurity professionals. They have now expanded their range to offer the new public server – 1. This server has insisted on much more than just the fundamentals. These fundamentals have been built on performance and DNSPerf, an independent testing site describes this DNS for PS4 as the fastest public DNS service available.
Cloudflare server will NOT log the querying IP address and any logs that are taken will be deleted in 24 hours. KPMG has been contracted to audit Cloudflare showing that it is ready to keep the promises it has made to its customers on keeping their identity private.
AD-blocking is not offered by Cloudflare and they will not try to monitor what you can access or what you can’t. Cloudflare’s 1. 2/1. 2 and 1. 3/1. 3 services have been introduced to enable content filtering for malware and blocking of adult content.
There is also a community forum where you can get to see how others are experiencing their service and ask your own questions.
4. OpenDNS
This is a seasoned operator in the market. The company was founded in 2005 and its current owner is CISCO. OpenDNS for PS4 provides you with web filtering that is optional and phishing sites will be blocked by default.
The primary and secondary OpenDNS servers are 208. 222 and 208. 220 respectively.
OpenDNS has two service packages, OpenDNS Home and OpenDNS Home VIP. They charge US$19. 95/year for the OpenDNS Home VIP service.
Their free DNS for PS4 has great features; blocking of phishing sites, high operating speeds, 100% uptime, optional parental controls, and free email technical support. OpenDNS will also give you the best IP address for PS4.
For the paid OpenDNS plan, you can view your internet activity history and there is the option to lock down your system by allowing access to specific websites only. This isn’t a must-have if you are an average user.
5. Comodo Secure DNS
The Comodo DNS for PS4 has a good focus on security although its performance might not be all that great. It has smart handling of parked domains.
The primary and secondary Comodo DNS server are 8. 26 and 8. 20 respectively.
Comodo DNS blocks phishing sites and will also warn you if the sites you are visiting have malware, spyware, or even parker domains. The server also offers the Comodo Dome Shield service which has additional features to those of the Comodo Secure DNS and is worth a try.
Comodo query time is 72ms which is less impressive than its smart routing technology. If you are in the market for an extra layer of web filtering, then Comodo DNS is a good choice.
Visit Comodo DNS here
6. Quad9
Quad9 DNS for PS4 provides its user with fast performance levels and requires little assistance when setting up. It will also block malicious domains.
The primary and secondary Quad9 DNS servers are 9. 9 and 149. 112 respectively.
Quad9 is fairly young and has been in operating since August 2016. It uses a variety of public and private sources to collect intelligence and apply this to block malicious domains.
Their DNS for PS4 has been rated as having the seventh-best query times in the world.
There is little information provided on how to set it up and tutorials have only been provided for the latest versions of Windows and macOS.
How to Configure DNS for PS4
To configure the DNS for PS4 you have chosen, you will have to (1) first configure a static IP in it. This will manually act on the parameters of your internet connection.
On the PS4, go to the toolbar and choose the icon on the gear (adjustments) and press the X button on the controller.
In the same way, (2) choose the menus RED View connection status and (3) write the following information: IP address from the PlayStation, subnet mask y Default Gateway.
If the PS4 hasn’t yet been connected to the internet, the information needed can be retrieved through the following ways:
Default Gateway – This is the router’s IP address which the PS4 should connect to (generally 192. 168. 1 o 192. 1).
Subnet mask – shows the total number of IP addresses that can be assigned by the router. Usually, this value is 255. 255. 0.
PlayStation IP – must be the same as the IP of the router, except for the last three digits of digits
The next step is then to (4) connect the PS4 to your Wi-Fi.
When you have the necessary information, (5) go back to the menu Settings>Network on PlayStation, (6) select this option, and this time configure internet connection and continue to (7) choose to connect via Wi-Fi or with the LAN network cable.
Proceed to (7) choose Custom, and continue with Wi-Fi, (8) select the wireless network to connect to and enter the password for access. This step is not necessary for a wired LAN connection.
On the IP address settings screen, (9) select Manual and complete the proposed form by entering, in the appropriate fields:
The information you just retrieved
The IP address to be assigned to the PS4
The subnet mask Default Gateway
Primary and secondary DNS addresses previously chosen.
Finally (10) set the value “Automatic MTU”, which indicates not to use proxy servers and that’s it. The console, after acquiring the static IP address, should be able to use the new DNS for PS4.
You can check the connection by going to Settings> Network> Check the Internet connection to make sure it is working.
You have now finalized the process for a lower ping and faster speed while playing. Enjoy!

How to Find Your IP Address on Windows or Mac – Avast
Public (external) IP vs local (internal) IP
Humans use plain-language addresses (such as) to refer to websites. But since computers store everything digitally, they need another system. That’s where IP addresses come in. To understand what an IP address is, think of it as a series of numbers that identifies any type of digital device on the internet.
There are two types of IP addresses: public (or external) IP addresses and local (or internal) IP addresses. The public address is provided by your internet service provider (ISP) and is how the internet recognizes your network. Each device on your local network, including your computer, has a unique local IP address that is usually assigned by the router on your internal network.
You may need a local IP address to do things like setting up printers or solving technical problems on your network.
If your problem isn’t on your own network — if the trouble is out there on the internet — knowing how to find your public IP address is an important troubleshooting step. For example, you may need to tell a tech support person your public IP address if you lose your internet connection or if you want to give someone permission to administer your network remotely.
(Though it’s not necessary if you want to find your IP address, it is worth knowing that the entire internet is based on a series of standards called TCP/IP. If you’re curious, this article explains what TCP/IP is. )
Even if you think you know your public IP address, you should check anyway because it may have changed. In some cases, the IP address you’re assigned by your ISP is “static” — that is, it never changes. But your ISP usually has the right to change your public IP address for its own business reasons — what’s called a “dynamic” IP address. The difference between static and dynamic IP addressing is at the root of a lot of connectivity problems.
As you dig into finding your IP address, you may see two different versions, expressed as IPv4 and IPv6. The computer industry is slowly moving from IPv4 to IPv6, but for most purposes, you need only care about IPv4. If you want to learn more, you can read about the differences between IPv4 and IPv6, and which is better.
How to find your public IP address
There are several simple ways to identify your public IP address. The easiest way to find your IP address is to use a free online tool such as HMA’s IP checker. The HMA tool quickly tells you your IP address, your location, and your ISP.
Another way to find your public IP address is to use Google search. Simply type in “what is my IP address” or “how to find my IP address” and the search engine will tell you — though it won’t reveal your ISP or your location.
Remember that these tools tell you your public IP address — the one the internet uses to find your network — not the local IP address behind your router.
Is my IP address secure?
No. Your public IP address is public. Just as there are tools that let you find your public IP address, there are tools that let other people find your public IP address, too. That might alarm you, and rightly so.
Everything you do online is tagged with your IP address: your emails, your online shopping activity, your browsing history. Someone who knows your IP address can identify your location, just as you can. This is how online ad tracking works: advertisers can feed you ads based on where you’re browsing from.
It’s hard to associate a public IP address with a particular person and, in the vast majority of cases, it’s not worth the effort. But a motivated stalker or cybercriminal might make that effort — so may law enforcement.
The best way to disassociate your public IP address from your location is to use a VPN (virtual private network). A tool like Avast SecureLine VPN routes your internet traffic through another network with a different IP address. That IP address may be assigned to some other place in the world and can’t be traced back to where you really are, effectively masking you.
How to find your local IP address on Windows
It’s simple to find your local IP address (the one on your local network, usually assigned by your router). It usually takes just a few clicks, but those clicks are different depending on which version of Windows you’re using.
Windows 10
Here’s how to find your local IP address in Windows 10:
Right-click on the Windows logo in the lower-left corner of your screen and select “Settings. ”
Click “Network & Internet. ”
Select “Wi-Fi” or “Ethernet” in the left-hand menu, depending on whether you’re connected wirelessly or via an ethernet cable.
Click “Network” in the center column. Your IP address will appear in the next window, in the entry “IPv4 address. ”
Windows 8/8. 1
Here’s how to check your local IP address in Windows 8 or Windows 8. 1:
Click the Network Connection icon and select “Open Network and Sharing System. ”
Double-click “Wireless Network Connection. ” Or, if you’re using a wired connection, double-click “Local Area Connection. ”
Click ”Details” and your IP address will appear.
Windows 7
Here’s how to find your computer’s local IP address in Windows 7:
Click the Network Connection icon and select “Open Network and Sharing Center. ”
Double-click “Wireless Network Connection” or “Local Area Connection” for wired connections.
Click “Details” and your IP address will appear.
Windows Vista
Here’s how to find your computer’s local IP address in Windows Vista:
Open the Windows Start menu and right-click “Network. ”
Click “Properties. ”
Click “View Status” to the right of “Wireless Network Connection, ” or ”Local Area Connection” for wired connections.
Click “Details” and look for the IP address in the new window.
Windows XP
Here’s how to find your computer’s local IP address in Windows XP:
Open the Windows Start menu and right-click ”My Network Places. ”
Click “Properties” and you’ll see a Network Connections screen.
Double-click “Wireless Network Connection, ” or “Local Area Connection” for wired connections.
Open the Support tab and click “Details. ” Your IP address will appear.
Find your local IP address using the command prompt (CMD)
If you’re handy with a keyboard or don’t like tapping through a multi-step process, you can use the Windows command prompt to find your local IP address. Here’s how to find your IP address using CMD:
Get to the command prompt by opening the Start (Windows) menu and typing cmd in the search bar. If you don’t have a search bar, open the Start menu and click on “Run. ”
At the command prompt or in the Run box, enter ipconfig. A window will open with several pieces of network arcana — the IP address is one of them.
How to find your local IP address on a Mac
Finding your local IP address on a Mac is straightforward:
Pull down the Apple menu and select “System Preferences…”
Pull down the View menu and select “Network. ” (Or you can double-click on the Network icon in the System Preferences window. )
In the left column, click on the network connection, generally either Ethernet or Wi-Fi, depending on whether you have a wired or wireless connection.
For an Ethernet connection, your local IP address will be shown.
For a Wi-Fi connection, click the “Advanced…” button in the lower-right corner, and then the “TCP/IP” button along the top of the window. Your IP address will be shown.
How to find your local IP address using the MacOS Terminal
If you don’t like menus and windows, you can start the MacOS Terminal app and use the command prompt to find your local IP address.
Start Terminal. It’s probably in the Utilities subfolder of the Applications folder.
Enter the command ipconfig getifaddr en1 at the command prompt. That will tell you the IP address of your wired Ethernet connection, if you have one. Or:
Enter the command ipconfig getifaddr en0. That will tell you the IP address of your wireless connection, if you have one.
To get your public IP address from the Mac Terminal, enter the command curl
Now, stop anyone else from finding your IP address
Your public IP address is how both websites and snoops find you on the internet. Sometimes that’s useful, because it means you can get personalized and localized information. But sometimes that’s tiresome or even dangerous. You should make it harder to be targeted, identified, and tracked online.
The best way to stop people from finding your IP address is to use a virtual private network, or VPN. A VPN is a simple piece of software that routes all your traffic through a third-party server, making it nearly impossible for anyone to know where you are or what your public IP address is.
Avast SecureLine VPN offers airtight online privacy by encrypting your internet connection with a simple click of a button. Download Avast SecureLine VPN today and enjoy true online freedom.

PS4 Static IP Address – SetupRouter.com
Those of you forwarding ports to your PS4 need to permanently assign an internal IP address to that gaming console. Forwarding ports on your router directs all traffic on certain ports to the internal IP address you name. If you do not permanently assign an internal IP address to your PS4 console, you may get a different IP address the next to you turn on your console causing your forwarded ports to stop working. To avoid this you can either assign an IP address in your router for your PS4 or setup a static IP address in your gaming console.
First you need to look for a way to permanently assign an IP address in your router. This process differs from router to router.
If you find that you have a router that does not allow for you to manually select IP addresses, you then have to set up the static IP address with the PS4 console itself.
Important Terms to Know:
Internal IP Address vs. External IP Address
Internal IP addresses are allocated by your router and are assigned to devices on your home or office network. Your router uses these internal IP addresses to get the correct data to each device. Internal IP addresses are used only by your router and they are not available to others over the internet.
External IP addresses are those that are shared with the world over the internet. Your router has an external IP address, allocated by your ISP (Internet Service Provider), which it uses to transfer data between your home/office network and the internet.
Static Internal vs Dynamic Internal IP Address
Static Internal IP Address refers to IP addresses that are permanently assigned. The internal IP address of your router is static. Some devices work best with a static IP address.
Dynamic Internal IP Address are assigned by the router and can change from time to time. This is why they are called dynamic. For example, a laptop using a dynamic internal IP address may have a different internal IP address after power is cycled to the laptop.
How to Manually Assign an IP address in Your Router
If you find this feature in your router, simply assign a permanent IP address to your PS4 (in your router) and no changes are required in your PS4 console. Your router then takes care of always assigning your PS4 the same IP address which functions exactly the same as a static IP. Follow these steps to assign an IP address in your router:
Step One
You can choose to permanently assign your PS4 to the IP address that it is currently using. To find this number:
Go to the Settings option in the PS4 Dashboard.
Then select Network from the list of options.
Select the View Connection Status option.
On the View Connection Status page you can find the IP Address, Subnet Mask, and the Mac Address. If you are using a WiFi connection to your PS4 then choose the WiFi MAC address, otherwise choose the LAN cable MAC address. (See screenshot below) Write all three of these numbers down.
img 5283 4×6
Step Two
Login to your router (through your computer) and permanently assign your PS4 to that IP address. For help logging in to your router visit our login guides.
Here is an example of a router that allows you to manually assign IP addresses.
router static ip address
In this router, there is a box to type the IP address into and then a drop down menu for the MAC address. (The MAC address of your PS4 console is a unique number and every console is assigned a different one from the factory. ) Some routers do not have a drop down menu to choose the MAC address from and instead have a place to type it in.
Step Three
After you have assigned your PS4 to a specific IP address, test the connection to make sure it is working. To test the connection:
In the PS4 Dashboard, choose Settings.
Select Network.
Choose Test Internet Connection.
img 5279 4×6
Wait while the test runs. It is checking your connections to make sure your console is communicating with your network and the internet.
Step Four
Once you have permanently assigned an IP address to your PS4 (in your router), and you have tested your connection (through the PS4 Dashboard), you can proceed to forwarding a port. For help setting up port forwards visit our router guides.
How to Setup a Static IP Address in Your PS4
If you have a router that does not allow you to manually assign internal IP addresses, follow these instructions to set up a static IP address in your PS4:
Find out what IP address, subnet mask, and gateway your PS4 console is currently using. To find this info:
Click the Settings option in the PS4 Dashboard.
Then choose Network from the list of options.
Finally, select the View Connection Status option.
On this View Connection Status page you should see the IP Address, Subnet Mask, and the Default Gateway. Write these down, you will need to enter them in later.
Login to your router (through your computer) and note the DHCP range your router uses. The DHCP range is the group of numbers that your router uses to assign internal IP addresses to devices on your network. For help logging in to your router visit our login guides.
Here is a screenshot of a linksys router. The DHCP range is circled in red.
dhcp range
Next, you need to pick a number between 2 and 254 that is outside of your router’s DHCP range to assign to your PS4.
In the example above, this Linksys router uses the range 100-149 to assign IP addresses to devices on the internal network. I chose to assign my PS4 to 201. The IP address that I am going to assign to my PS4 is 192. 168. 1. 201. (Be sure to use the first three numbers that are in your router’s IP address, also known as the gateway. ) Here are a few more examples for you:
If your router’s DHCP range is 200-254 you could choose a number between 2 and 199.
If your router uses 50-200, you could try a number between 2 and 49.
To find out if the address you chose is available ping the address using the command prompt. To do this:
Click on the windows Start menu
Type cmd into the dialog box (in the windows start menu)
windows main
Now click on (which should be listed over the dialog box). A black window with white text should open.
cmd image
In this black box:
Type ping
Tap the space bar
Then type in the IP address you want to check. Hit Enter.
destination host unreachable
If you ping an address and do not receive a reply, then the IP address is available for you to use. (See example above. ) If you do receive a reply then that IP address is in use and you will have to try a different one. Below is an example showing an address that has already been assigned.
host reachable
Step Five
Now, go to the PS4 Dashboard to set the internal IP address to the number you have chosen.
In the PS4 Dashboard:
First, click the Settings option.
Then choose Network.
Now select the option of Setup Internet Connection
img 5261 4×6
Next, the console prompts you to choose how you will connect to the internet. Your choices are Use a LAN Cable, meaning you have a wired connection or Use Wi-Fi.
img 5266 4×6
The next question is How do you want to set up the Internet Connection? Choose Custom
img 5267 4×6
You are now on the IP Address Settings page. Choose Manual.
img 5273 4×6
You should now be on a page like the one you see above.
Highlight the IP Address and click the X button on your controller.
img 5274 4×6
A black box with a number pad then appears. Enter in the IP address you have chosen to use here.
Click Done when you are finished.
Now enter in the Subnet Mask. This is usually 255. 255. 0
Finally, select Default Gateway and enter the number you wrote down earlier for the gateway (see Step One). This is your router’s internal IP address.
When you are finished, click the Next button at the bottom of the screen.
The next screen is the MTU Settings, go ahead and click automatic here.
For the Proxy Server, click Do Not Use
img 5278 4×6
A page like the screenshot above should then appear. Go ahead and click Test Internet Connection.
This test checks your Network, Internet and PS4 connection status. Wait while the test runs.
img 5281 4×6
When the test is complete and successful you will see a screen like the one you see above.
You can set up your port forwards to your PS4. For help with port forwarding you can check out our router guides.
More Info
To learn more about IP addresses you can check out this guide.
If you need to figure out how to find your router’s IP address this guide can help.
You can find the user manual for your router within our router guides.
To learn about what a port is visit this guide.
Frequently Asked Questions about whats my ip address ps4
What is the best IP address for PS4?
8.8 and 8.8. 4.4 respectively. This DNS for gaming is simple to use and an effective replacement for the default that you have been using. Google DNS for PS4 will enable the best IP address for gaming giving you a steady connection that also runs seamlessly.Aug 10, 2020
How do I find my IP address?
Open the Windows Start menu and right-click ”My Network Places.” Click “Properties” and you’ll see a Network Connections screen. Double-click “Wireless Network Connection,” or “Local Area Connection” for wired connections. Open the Support tab and click “Details.” Your IP address will appear.Sep 26, 2019